To address the issue of better preserving the rechargeable batteries in our mobile devices, while also optimizing their centralized management, Impossible Design has put into practice the concept of a piece of furniture that combines different chargers, controlled by a programmable connected socket.
This feedback, sprinkled with a few iD! tips to pick up, may encourage you to recharge all your batteries too!
This tutorial on organizing daily life follows on from those devoted to saving water in the home and alternatives to plastic wrap in the kitchen.
Make a preliminary assessment
Do you have any idea how many chargers for mobile devices with rechargeable batteries you use at home?
And how many remain permanently plugged into electrical outlets?
It was when we asked ourselves these questions one day that we realized we had more than twenty devices to charge at home:
3 cell phones, 4 cameras, 3 scooters, 2 tablets, 1 cordless vacuum cleaner, 1 laptop, 5 speakers, wireless headphones and earbuds, various DIY and gardening tools from different brands, not to mention all the devices that run on rechargeable AA batteries (toys, video doorbells, lamps, etc.).
Some chargers or devices remained plugged in, either for convenience, such as cordless vacuum cleaners and smartphone chargers, or simply through negligence in other cases, 24 hours a day, reducing both their own lifespan and that of the batteries, while consuming a few watts unnecessarily...
It was time to put our thinking caps on and implement a centralized home automation solution that was economical and made good sense!
Proof of concept: the iD! charger cabinet
Choosing furniture
The first step is to find a drawer unit that can hold all your chargers, with a removable (or perforated) bottom to make it easier to pass through the power cables.
Even though accidents involving loaders catching fire are extremely rare, given that so many small sources of risk are concentrated in one place, we felt it was wise to choose metal furniture rather than wood, as metal can slow down, and hopefully even contain, the spread of fire.

We chose a small IKEA metal cabinet that you assemble yourself, with casters, which are essential and make it easier to add an electrical cable.

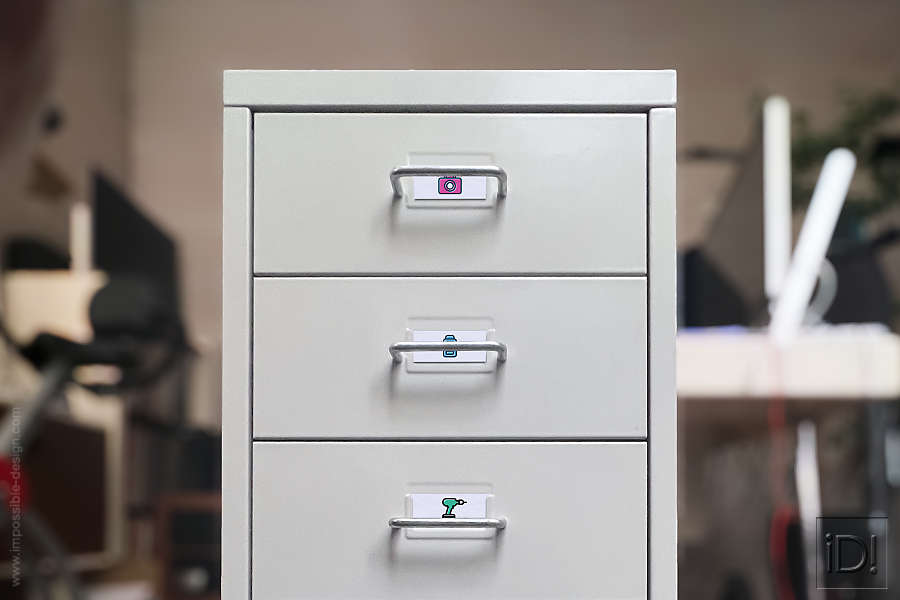
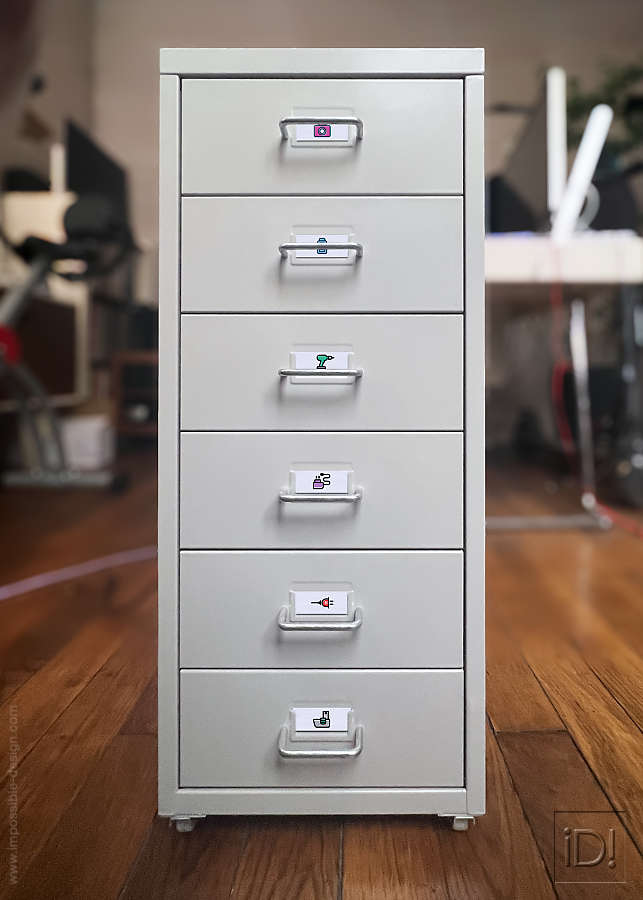
For attention to detail, each drawer is labeled according to the type of charger it contains.
Organization of the battery charger cabinet
Before organizing your cabinet, ask yourself:
Which chargers can I leave inside permanently, and which ones am I likely to use elsewhere?
For the latter, it is preferable to provide a dedicated, accessible power strip to which they can be easily plugged in and unplugged.
Optimization of cables and power strips for chargers
You need to make sure that the electrical cables are long enough for the height of the drawers, taking into account how far they open, so that you don't end up looking like a puppeteer!
In practice, the drawers in our cabinet have a fairly short travel distance, so they open without being hindered by the electrical wires in any way.
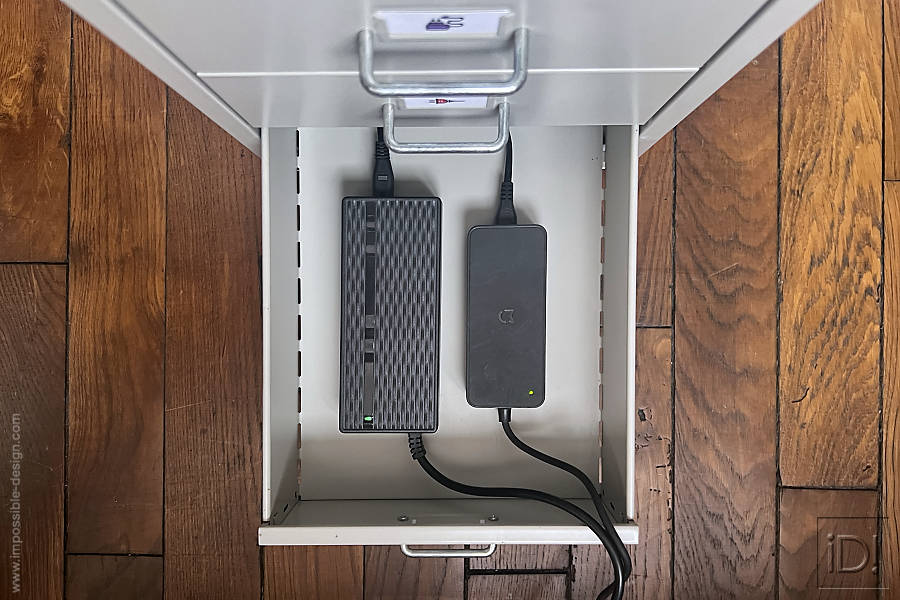
Several power strips may also be needed to connect all the chargers: the main one can be hidden behind the cabinet, while others that are more accessible can be placed on top or inside the drawers.
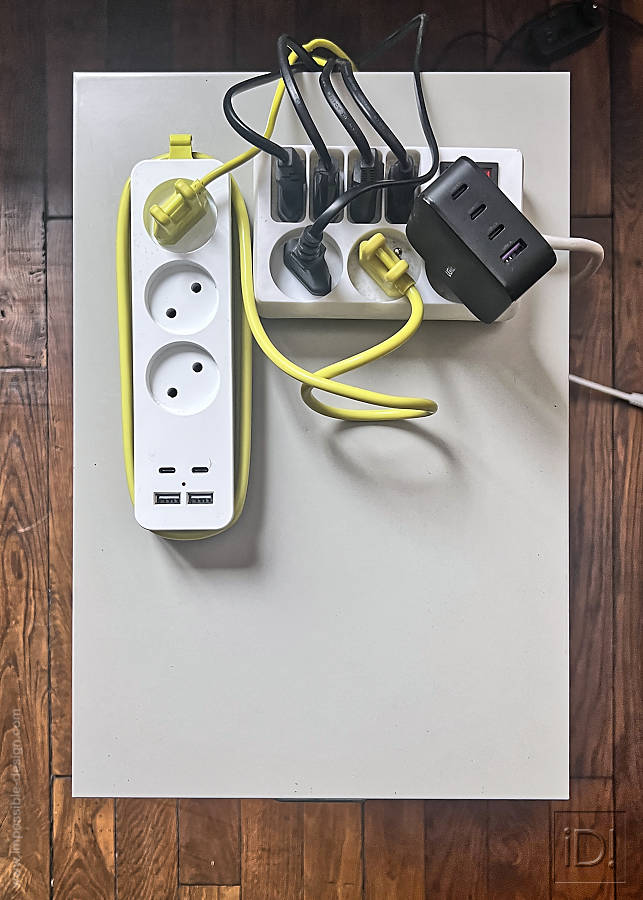
For practical rather than aesthetic reasons, we have chosen to leave power strips with USB ports on the furniture, making it easier to plug in and unplug mobile devices such as phones, tablets, speakers, earphones, and wireless headphones.
But to free up space on top of the cabinet, it is entirely possible to use the top drawer for this USB connection (even if this may be slightly less convenient to use).
Here, a small power strip with a switch allows you to turn off the least-used chargers in their drawers, such as, in our case, those for power tools.
Organization of charger drawers
For the top drawers, the key is to prioritize how often you use the chargers and group them by theme.
You can open two drawers in succession to see several loads in progress.
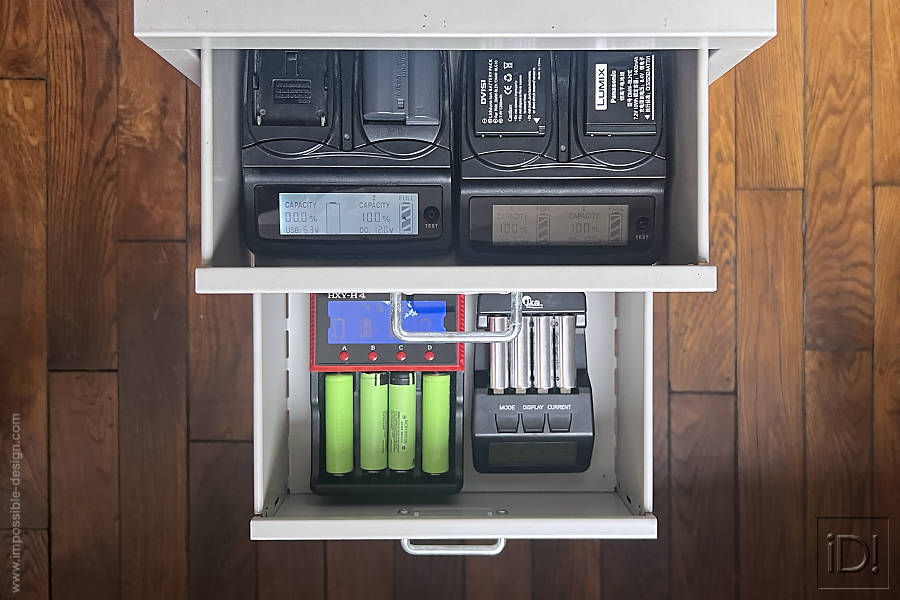
The rechargeable battery drawer
The top drawer is dedicated to charging the batteries for our four cameras and video lights.
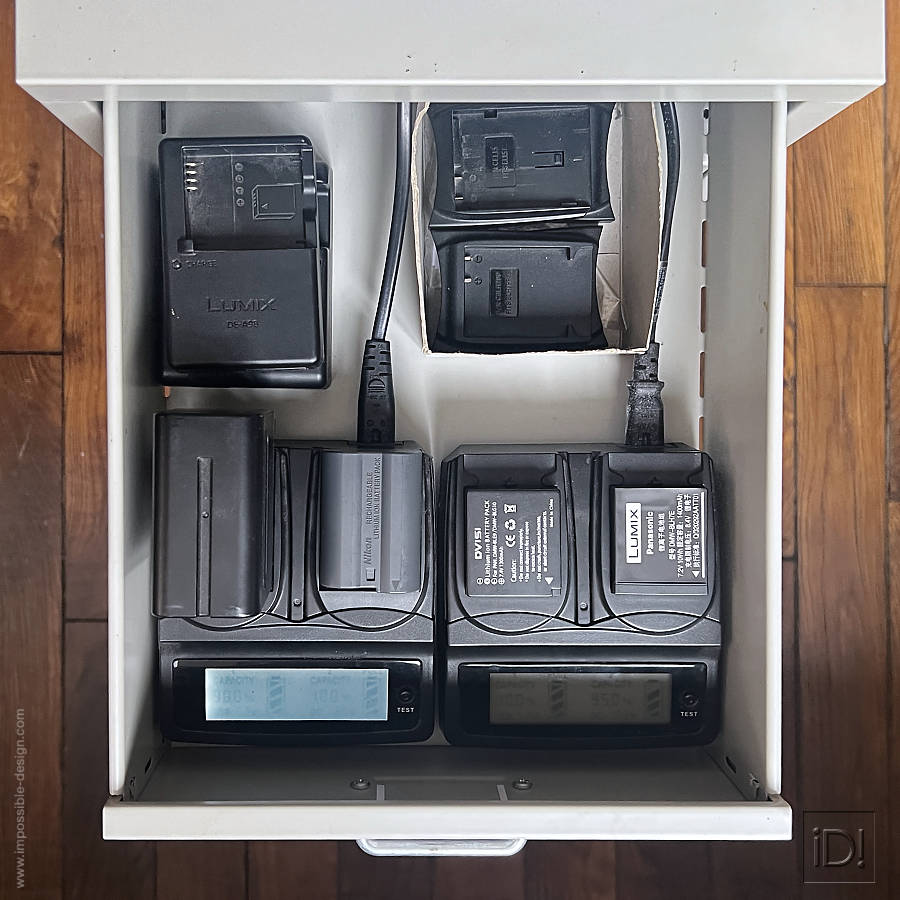
Since cameras are, by nature, portable devices, it is practical to keep their original chargers for travel and to have one or two universal multi-battery chargers that can remain in a drawer at all times, with interchangeable trays for each brand.
The rechargeable battery compartment
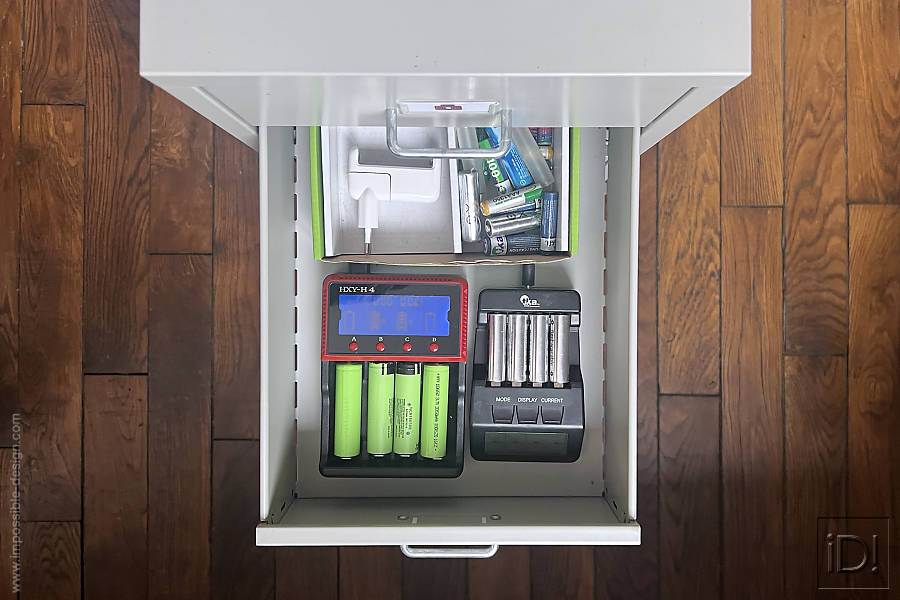
The second drawer of the cabinet is dedicated to standard rechargeable batteries and contains chargers for the most common AA and AAA batteries, as well as other types of stick batteries, including large long-life green batteries (D batteries) used, for example, in video intercoms or alarms.
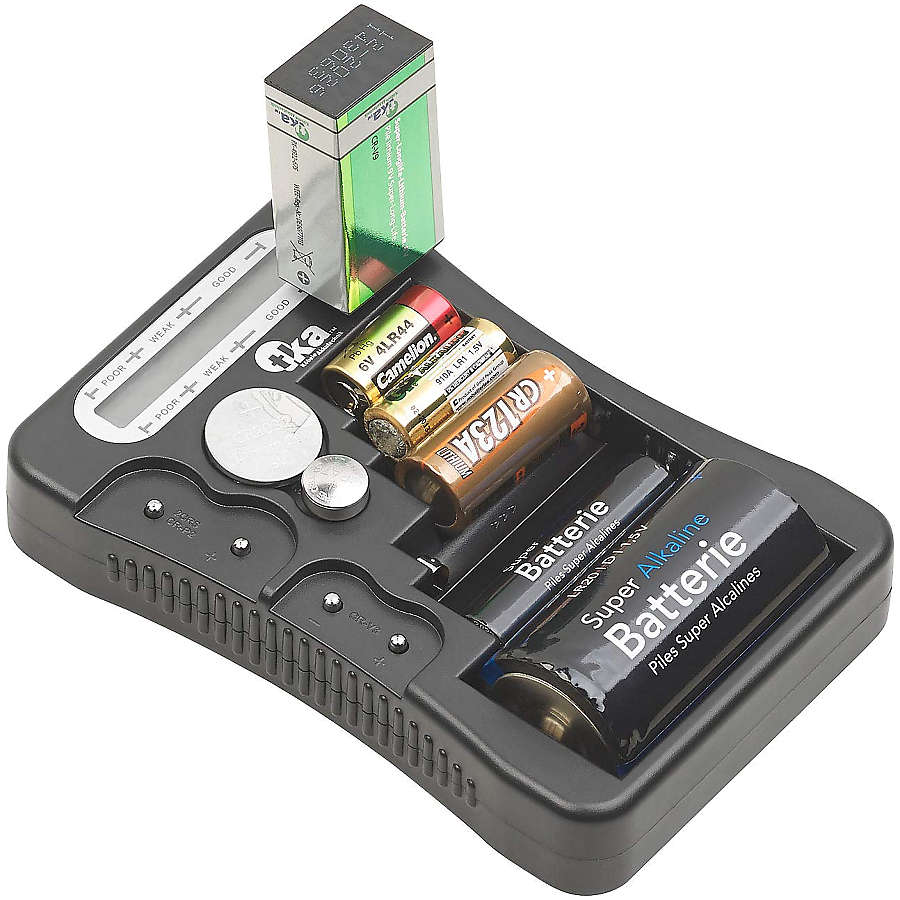
In the same drawer, there is a battery tester, an essential tool for checking the efficiency of the charger cabinet!
The drawer for power tool chargers
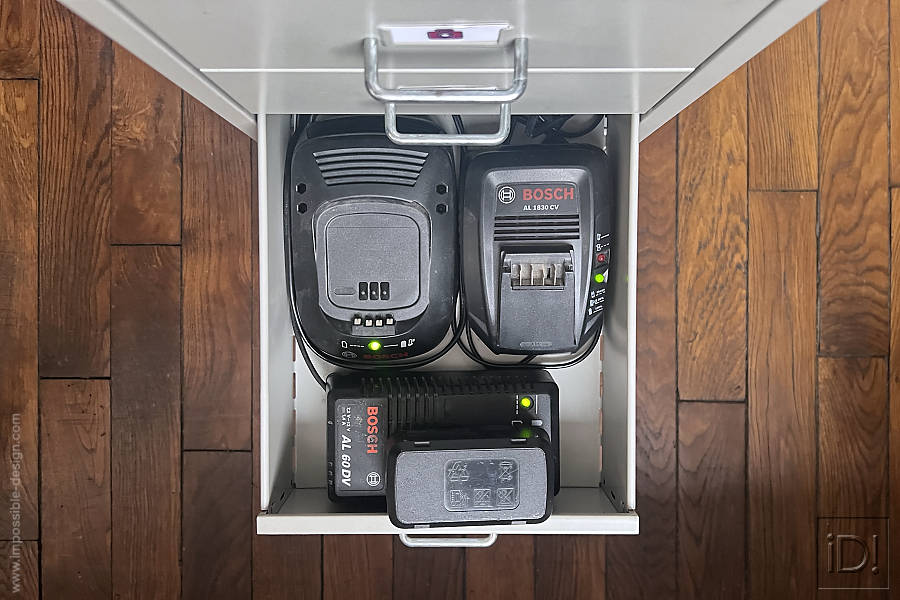
In this third drawer, we install chargers for various power tools and garden tools.
As these rarely have removable power cords, it is essential to install a small power strip at the bottom of the drawer, which makes it easier to unplug them and take them elsewhere if necessary.
The bike or scooter charger drawer
Placed in the bottom drawer, the charging blocks for our three scooters, made by Xiaomi, E-twow, and Ninebot, are logically located closest to the floor.
Autres tiroirs et à côtés
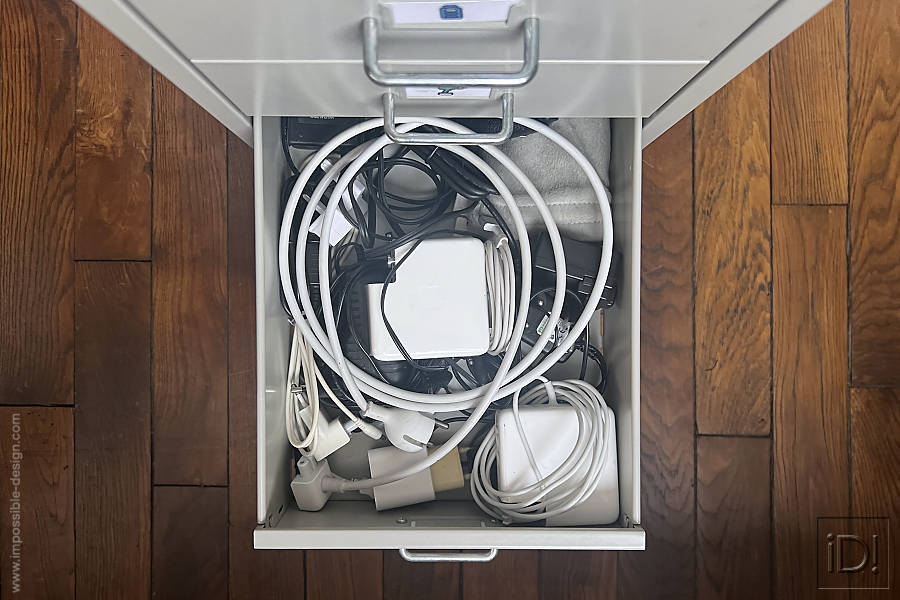
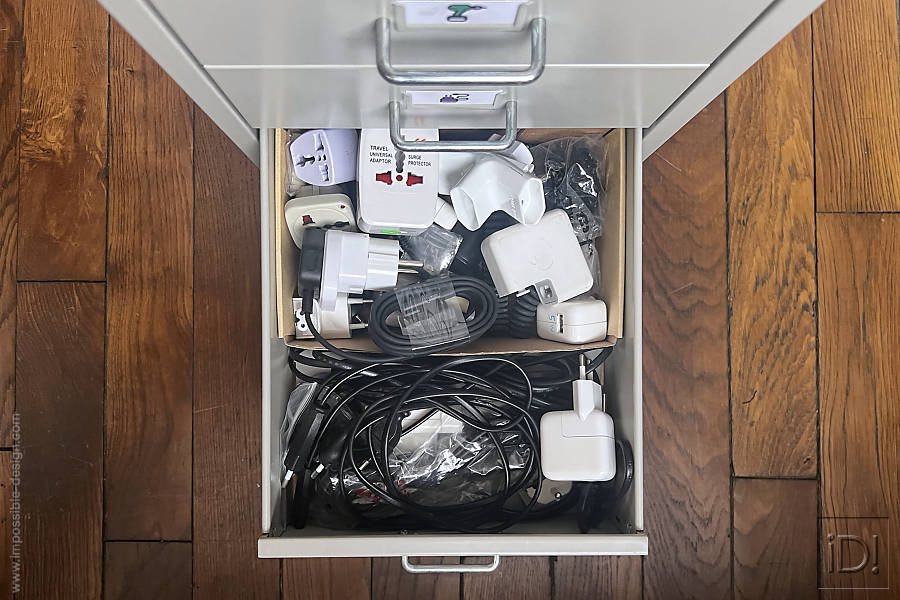
The two remaining drawers are dedicated to travel chargers in one case, and adapters, cables, and various power strips in the other.
Finally, outside the cabinet, a cordless vacuum cleaner is also connected to the same smart home outlet, which also helps extend its battery life by reducing microcycles of charge maintenance.
Battery charger cabinet, basic version
A partir d’une seule prise principale (ou d’un bloc multiprise) ayant un interrupteur, vous pouvez contrôler manuellement, de matière efficace et centralisée, la totalité de votre meuble à chargeurs.
La seule contrainte est de surveiller 🧐 ce qui s’y passe.
Battery charger cabinet, home automation version
iD+: using a programmable smart plug to manage charging.
It is important to note that any charger that is plugged in always consumes a small amount of electricity, even when not in use. If it remains plugged in unnecessarily for several years in a row, its lifespan will also be reduced.
Using a smart plug for a set of chargers makes perfect sense, as it allows the power supply to be cut off automatically as soon as consumption falls below a certain threshold.
This threshold must be calculated based on the total “no-load” consumption of all connected chargers.
In our case, our charger cabinet has around 16 chargers, 12 of which are active when the home automation socket is switched on, and 4 of which are activated less frequently on the same network, using the switch on a power strip.
Choosing a precision home automation outlet
The charger cabinet is controlled by a Figaro Z-Wave home automation socket, which measures power consumption very accurately, to two decimal places.
This makes it possible to select a consumption value slightly above the minimum overall consumption of the chargers that are permanently connected to this socket.
When charging one or more devices, you must, of course, activate the smart plug using your smartphone or, even more simply, if the plug is high up, using the switch located on it.
Using several different programmed scenarios (in our case via a Jeedom interface), we can control automatic shutdown regardless of the charge(s) in progress and create other extremely practical features, such as sending text messages or notifications.
PLEASE NOTE: Few home automation solutions allow scripts to be triggered as precisely as in the following example, and not all sockets capable of measuring exact consumption can necessarily be programmed into scenarios.
Our home automation scenarios and scripts in Jeedom
Our main automation for the charger cabinet consists of measuring the overall consumption level and cutting off the power supply below a certain threshold.
In the Jeedom dashboard below, you can monitor the consumption of the “Charger cabinet” and also see which scenarios are active (small gray blocks).

More advanced scenarios can identify certain chargers based on their consumption peaks (as some operators do with electricity meters).
This allows specific scripts to be triggered for certain devices, such as our scooters.

Our 12 main chargers consume approximately 5.8W, so our scenario entitled “Stop <5.8W” was set slightly above their no-load consumption.
Scripts can be used to send alerts* via SMS when certain consumption levels are reached:
- To warn of a power outage and indicate that the installed batteries are charged.
- To send intermediate information, useful for more powerful chargers with charging times exceeding several hours, such as those for scooters.
For example, an SMS alerts us when the power drops below 30W—only if a consumption peak has previously exceeded 90W—meaning that a scooter is more than 90% charged (see battery optimization tips).
*Some operators offer options that allow you to schedule SMS messages to be sent from certain devices such as NAS or home automation boxes.
An alternative solution would be to use a home automation app on your smartphone that can send similar notifications.
For consumer home automation systems that do not yet allow actions to be triggered based on consumption, such as Apple Home or Google Home, simpler scenarios can be considered, with triggers programmed according to fixed time periods (such as at night), but this will be less efficient in terms of preserving battery life.
Adaptability of the concept
A single piece of furniture that combines all the chargers in a household can be restrictive for a family, but with our charger furniture concept, you can easily connect several devices to the same connected socket and control them according to their consumption.
In our case, in the kitchen, a smart home outlet automatically cuts the power to several devices that are inactive or on standby (coffee maker, pressure cooker, etc.) as well as a watch/smartphone charger from a well-known brand with an apple logo.
With the possibilities offered by a home automation solution, there are no limits to the imagination when it comes to optimizing the charging of each of your mobile devices.
You might also be interested in these other tutorials:


Preserving rechargeable batteries
3 basic rules for extending the life of rechargeable batteries:
- Preserving the batteries in our mobile devices (smartphones, tablets, etc.) can be achieved by following a fairly simple rule: never recharge them to 100%.
- Limiting battery recharging to 80-90% of its capacity helps to extend its life.
- Do not leave devices plugged in once their batteries are fully charged.
Even though some recent devices such as Apple smartphones can optimize their charging, this is not the case for all devices that have rechargeable batteries.
That's why it's always best to unplug chargers in a timely manner.
To achieve this, we can rely on our vigilance (which can sometimes be unpredictable) or on automation enabled by home automation systems.
5 things to know about charging batteries
- The small batteries in our mobile devices generally charge more quickly up to around 80-90% of their capacity.
- Beyond that, charging slows down and is no longer really necessary if we want to extend the battery life in the long term.
- Conversely, you should also avoid completely discharging a lithium battery, as this can cause permanent loss of capacity.
- Always remember to unplug the charger from a smartphone or mobile device once it is fully charged to avoid microcycles of charge maintenance, which deteriorate the useful capacity of batteries in the long term.
- Finally, induction charging should be avoided as it is inefficient and results in energy loss and additional consumption, which can sometimes be up to 30-50% more than a simple wired charger.